
After years of watching weekend warriors turn perfectly good ribeye into expensive hockey pucks, I’ve come to one inescapable conclusion: most backyard grillers are fighting a battle they don’t even know they’re losing. The secret weapon? 2-zone grilling.
This technique isn’t just some fancy chef nonsense. It’s the difference between being the neighborhood BBQ hero or the person everyone politely thanks while secretly ordering pizza later. Trust me, once you master this method, your grill will become the neighborhood’s most coveted dinner invitation.
What Exactly Is 2-Zone Grilling?
Picture your grill as having two completely different personalities. One side is like that friend who’s always cranked up to eleven: hot, intense, ready for action. The other side? More like your zen meditation instructor: calm, gentle, taking its sweet time.
2-zone grilling means creating two distinct heat zones on your grill: a screaming-hot direct heat zone for searing and a cooler indirect heat zone for gentle cooking. The direct zone runs between 450°F and 550°F – perfect for getting those desired grill marks and that satisfying sizzle that makes your neighbors peer over the fence. The indirect zone sits at 225°F to 300°F, where tough cuts transform into tender, juicy masterpieces without turning into leather.
Think of it this way: your kitchen oven doesn’t blast food with direct flame from below, right? It surrounds food with consistent, controlled heat. The indirect zone does exactly that – turns your grill into an outdoor oven.
Why Your Steaks (and Your Reputation) Need 2-Zone Grilling
Here’s the thing nobody tells you at the hardware store when you’re dropping serious cash on that shiny new grill: most cooking disasters happen because of too much direct heat for too long. Proteins are finicky little prima donnas – blast them with high heat the entire time, and they’ll shrink up tighter than your jeans after Thanksgiving dinner.
But here’s where 2-zone grilling becomes your secret weapon. You can sear a thick steak over the hot zone to lock in those incredible flavors and get that beautiful crust, then slide it over to the cool zone to finish cooking gently. No more gray band of overcooked meat around the edges, no more raw centers that would make a vampire uncomfortable.
Setting Up Your Grill for 2-Zone Success
Charcoal Grill Setup
If you’re team charcoal, setting up 2-zone grilling is surprisingly simple. Light up your chimney starter – and please, for the love of all that’s holy, use a chimney starter. Lighter fluid makes everything taste like you’re eating around a campfire that someone accidentally kicked gasoline into.
Once those coals are glowing like tiny suns, dump them all on one side of your grill. All of them. Don’t get cute and try to distribute them evenly – that defeats the entire purpose. One side gets all the coals (your direct zone), the other side gets nothing but love and patience (your indirect zone).
Pro tip: If you’re planning a longer cook, create a little coal bank by arranging them in a slight slope. This helps maintain consistent heat as they burn down.
Gas Grill Setup
Gas grill warriors, you’ve got it even easier. Turn on the burners on one side to medium-high (or high if you’re feeling spicy), and leave the other side completely off. Boom – instant 2-zone grilling setup. Some of you perfectionists might want to get fancy with a three-burner grill, using two burners on medium for your hot zone and leaving one off for the cool zone. Experiment and find what works for your particular grill’s personality – because yes, every grill has a personality, and getting to know yours is half the fun.
The Art of Temperature Control in 2-Zone Grilling
Now we’re getting to the good stuff – the part that separates the weekend warriors from the backyard legends. Temperature control isn’t just important in 2-zone grilling; it’s everything.
Your direct zone should hover between 450°F and 550°F. This is searing territory, where magic happens in minutes. The high heat creates that gorgeous Maillard reaction – that’s the fancy science term for “making things taste absolutely incredible.” When you hear that satisfying sizzle as your steak hits the grates, that’s the sound of flavor being born.
The indirect zone needs to maintain a gentler 225°F to 300°F. This is low-and-slow country, where tough cuts become tender and thick proteins cook evenly without the outside turning into charcoal.
Here’s where most people mess up: they trust that little thermometer built into their grill lid. Friend, I hate to break it to you, but that thing is about as reliable as weather forecasts in March. Invest in a good digital thermometer – your taste buds (and dinner guests) will thank you.
Mastering the Sear-and-Finish Technique
This is where 2-zone grilling really shows off. Let’s say you’ve got a gorgeous two-inch thick ribeye that costs more than most people spend on lunch for a week. You want to do right by that beautiful piece of beef, right?
Start by letting that steak come to room temperature – about 30 minutes on the counter. Cold steak hitting hot grates is like jumping into a pool in January; the shock doesn’t do anyone any favors.
Season that beauty generously (I’m talking more salt than you think you need), then lay it down on the direct zone. Listen to that sizzle – that’s the sound of a perfect crust forming. Give it 2-3 minutes per side to develop those gorgeous grill marks that’ll make your Instagram followers jealous.
Now here’s the magic: slide that steak over to the indirect zone and let it finish cooking gently. Depending on thickness and your preferred doneness, this might take anywhere from 5-15 minutes. Use your trusty thermometer to hit your target temperature, and you’ll have a steak that’s perfectly cooked from edge to edge.
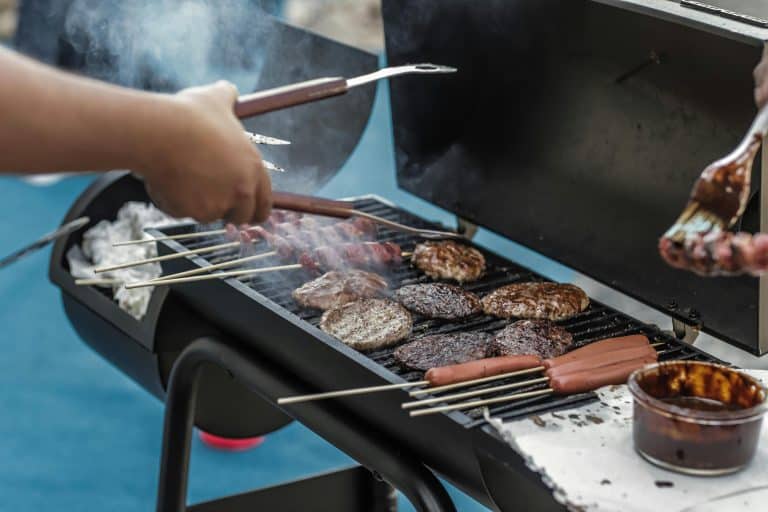
Smart Food Placement: What Goes Where
Not all foods are created equal, and knowing what belongs in each zone is crucial for 2-zone grilling success.
Direct Zone Champions:
- Thin steaks and chops
- Burgers (but watch those flare-ups!)
- Vegetables that can handle the heat
- Anything that needs a quick sear
Indirect Zone Heroes:
- Thick roasts
- Whole chickens
- Ribs (low and slow is the only way)
- Delicate fish
- Sweet foods that might burn (pineapple, I’m looking at you)
Here’s a real-world example: hosting a mixed grill party where you’ve got burgers for the kids and a fancy bone-in ribeye for the adults. Burgers go over direct heat for that classic char, while the ribeye gets the sear-and-finish treatment using both zones. Everyone’s happy, and you look like a grilling genius.
Avoiding Common 2-Zone Grilling Mistakes
Let me save you from heartbreak. Flare-ups are the arch-nemesis of perfectly grilled food. When fat drips onto those hot coals or burner plates, you get flames that can turn your beautiful dinner into a charcoal sculpture. This is where the indirect zone becomes your safe harbor. See flames starting to lick your food? Slide it over to the cool zone faster than you’d move away from your uncle’s political opinions at Thanksgiving dinner.
Another common mistake: trying to cook everything at the same time in the same zone. Different foods need different amounts of heat and time. Your asparagus doesn’t need the same treatment as your pork shoulder, folks. And please, resist the urge to constantly flip and move things around. I know it’s tempting – the grill calls to you like a siren song – but let the 2-zone grilling setup do its work. Trust the process.
Taking Your BBQ Game to the Next Level
Once you’ve mastered basic 2-zone grilling, you can start experimenting with techniques that’ll have people thinking you attended culinary school.
Try reverse searing – start thick steaks in the indirect zone to bring them up to temperature slowly, then finish with a blazing hot sear in the direct zone. The result is edge-to-edge perfection that’ll make grown adults weep tears of joy.
For the adventurous, add a water pan in your indirect zone when you’re smoking ribs or pork shoulder. The humidity helps keep the meat moist during those long, slow cooks, and the water absorbs heat to help maintain consistent temperatures.
Consider this your graduation moment: when you can juggle chicken thighs in the indirect zone while perfectly searing vegetables in the direct zone, timing everything to finish at the same moment – that’s when you know you’ve truly mastered 2-zone grilling.
Your Journey to Grilling Greatness Starts Now
Look, I could keep going about the science of heat transfer and the molecular gastronomy of perfectly cooked proteins, but here’s the bottom line: 2-zone grilling isn’t just a technique – it’s your ticket to becoming the pitmaster your backyard deserves.
Start simple. Try the sear-and-finish method on your next steak. Feel the confidence that comes with having complete control over your cooking temperatures. Watch as your friends and family start asking what your secret is. Because here’s the beautiful truth about 2-zone grilling: once you understand it, you’ll wonder how you ever cooked without it. Every grill session becomes an opportunity to create something amazing, not just hope you don’t ruin dinner.
So fire up that grill, set up those zones, and get ready to join the ranks of backyard BBQ legends. Your taste buds are about to thank you, and your reputation as the neighborhood grill master? Well, that’s about to be legendary.